Showing posts with label My Baking Pantry. Show all posts

Tuesday, October 30, 2012

Cheese Biscuits - Red Lobster Style

Soft moist cheese biscuit
I missed Red Lobster biscuits. Those warm fluffy cheesy biscuits. Once in a while, my craving for these biscuits will take over my mind, making me forget the bad Red Lobster's service, the horrible long line, and really bad lobsters. 

Like a zombie, I will be sitting in a Red Lobster restaurant, waiting for the wait staff to bring me those biscuits to satisfy my craving. I would eat so much biscuits that by the time my dinner arrived, I am too full. Maybe that's why I never find the entrees memorable. In fact, all I could remember is never to order lobster from my local Red Lobster restaurant. ;p

Cheesy, buttery, salty
A month ago, I came across a recipe for these cheese biscuits and decided to make some for my family. They turned out good, not quite the same as Red Lobster but close enough. 

Today, I decided to try the recipe again with a tab more butter and they turn out beautiful. Soft, fluffy, buttery and moist - better than Red Lobster. Another great experiment. =)
Red Lobster Cheese Biscuits

Recipe

(Makes about 10 ~ 12 biscuits)

2 cups Bisquick mix
2/3 cup milk
1/4 cup cheddar cheese
1/4 cup mozzarella cheese
1/4 cup butter
1/2 tsp butter
1/4 cup melted butter
1/4 tsp garlic powder
1/4 tsp dried parsley


1. Place Bisquick mix, cheddar cheese and mozzarella cheese in a large bowl. Mix with spatula until combined.

2. Place 1/4 cup butter in a microwavable bowl and cover with cling wrap. Microwave for 20 seconds or until butter fully melted.

3. Mix butter with milk.

4. Make a hole in the middle of the cheese mix. Pour in milk. Mix until dough forms.

5. Gather dough into a ball. Use hands and punch dough vigorously for 30 seconds.

6. Gather dough into a ball. Grab dough with hands and throw the dough back into the bowl. Repeat for 30 seconds.

7. Repeat step 5 and 6 until dough appears smooth. (About 5 times)

8. Place parchment paper on baking tray. Coat parchment paper with 1/2 tsp butter.

9. Using spoon or ice-cream scoop, drop 1 1/2 tbsp of batter onto tray. Repeat until all batter is used.

10. Bake in a pre-heat oven at 450 F for 12 ~ 15 minutes or until golden brown.

11. Mix 1/4 cup of melted butter with garlic powder and dried parsley to create garlic butter.

12. Brush the surface of the biscuit with garlic butter once they are removed from oven.

13. Leave on rack to cool. Served warm.

*****************************************************************************************************************

Tips & Tricks

1. You can coat your hands with some oil when handling the dough to prevent the dough from sticking to your hands.

2. When throwing it back and fro in bowl, throw it hard. It will help the dough to form.

3. Do not use hands to form nice round balls for baking. Dropping batter to tray will help create the rough surface of the biscuit.

4. The garlic butter must be applied to biscuit immediately after they are removed from oven.

*****************************************************************************************************************

My Baking Pantry

Bisquick, Parsley Flakes, Garlic Powder
This was my shopping bag for today. I got all these from Safeway. Commonly found ingredients in various supermarket in USA. Although I remember the parsley flakes and garlic powder are cheaper at Target. Oh well, no time to go Target today.


Monday, September 24, 2012

Poached Pears

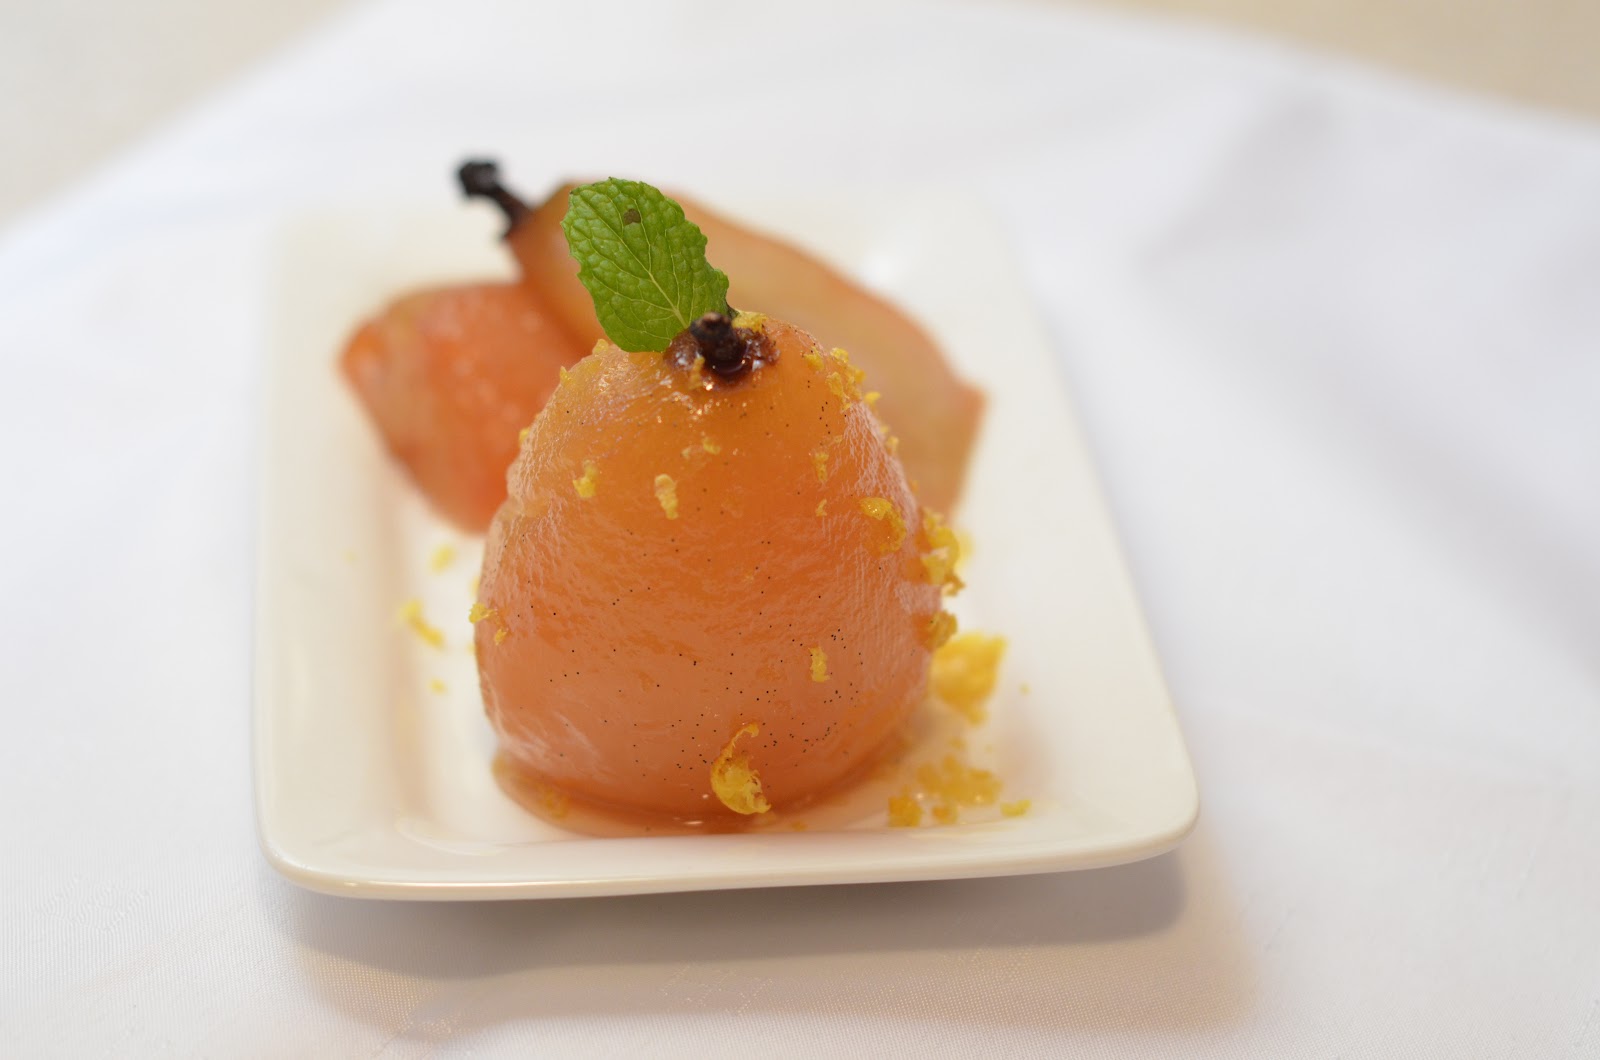
Poached Pears
I have a bag of pears in the fridge awaiting to be ripen, but after more than one month, they are still as firm as day one. Must be some powerful preservative or fertilizer that the farmer used! 

Time for me to do something with them. What's the quickest way to soften a pear? Poaching! I loved poached fruits. The cooking process brings out the sweetness of the fruit, paired with the added flavour from the poaching syrup, it's like eating a vanilla pear.

Poached pear with vanilla and lemon zest

Poached pears are easy to make, quick to impress but long to cook. It's a slow cooking process. The good thing is that you can always make this in advance and served with ice-cream during dessert. =)

Poached pears served with mint leave and lemon zest

Recipe


4 Bosco pears
2 cups water
2 cups sugar
2 tablespoon lemon juice
2 tablespoon lemon zest (leave 1 tablespoon for garnishing)
1 vanilla pod (split open)
2 whole cardamon seeds (cracked open)
1 stalk mint leaves (optional)

1. Bring water to a boil and wish in sugar. Continue to boil for 10 minutes or until sugar completely dissolved.

2. Add in lemon juice, 1 tablespoon lemon zest, vanilla pod and cardamon seeds.

3. Bring the syrup to a boil and whisking occasionally to incorporate the flavour for about 15 minutes. Leave syrup on stove under low heat.

4. Peel the pears. Place pears in syrup. Cooked for 30 minutes under low heat.

5. Remove pears and leave to cool in a plate. Cool both syrup and pears to room tempature before placing in fridge.

6. Served with lemon zest and mint leaves.

********************************************************************************************************

Tips and tricks

1. Make sure that pot is big and deep enough to fit all pears.

2. Pears will float when placed into the syrup. This is normal.

3. Do not wash the vanilla bean before use.

4. You can replace the cardomon seeds with 1 cinnamon stick.

5. Use the back of a spoon to crack open the cardomon.

6. Choose pears that are firm. Soften pears will mush up during cooking.

7. For better presentation, choose pears will longer stalk.

8. You may core them if you like, but leave the stem in place.

9. Warm or cold with ice-cream or cream.

10. You can keep left-over syrup in the fridge for up to 3 months and continue to use them.

********************************************************************************************************

My Baking Panty

Madagascar Vanilla Beans
You can buy whole vanilla bean from various supermarkets and online. I find that it's cheaper online than in the supermarket. I got some Madagascar vanilla beans from Amazon.

If you are getting them from the supermarkets, you can find them near the spices section.

Disclaimer - I am not compensated monetary in any way for the shopping link.

Friday, September 21, 2012

Green Tea Mousse Cake

Green tea mousse cake

For birthdays, we normally get a mousse cake from a small bakery in Chinatown. It's my husband's favourite cake and cost about $32 for a 9 inch cake. This year, with ample notice from the family, I decided to make one. 

Green tea mousse cake with cake crumbs
I loved family gathering. It's a chance for me to make a bigger cake to share with family and not have to finish it all. Specially during a time where I had been making desserts for the past weeks and my husband and I are on sugar overload; so it's a good time to share. =)

Layer of light airy mousse sitting on top of a layer of soft fluffy cake
After some deliberation, I decide on green tea mousse cake. With one layer of light airy mousse sitting on top of a layer of soft fluffy cake, followed by another layer of cake and mousse and covered with cake crumbs.

My only challenge when making the mousse was gelatin. I hardly ever used them for baking so I found that it take a fair bit of understanding when using them. First, I overcooked them, then I threw them into cold batter causing them to lump up, next I undercooked them... Two batter mixes, four packs of gelatin and loads of cursing later, I'm glad to say the mousse was smooth and light. See below for tips with working them. =)

Recipe


For cake
4 eggs (separate yolks and whites)
1/4 tsp cream of tartar
90g sugar (divide into 40g and 50g portions)
30g milk
50g corn / vegetable oil
90g cake flour
1 tsp green tea powder (a.k.a matcha)

For Mousse
9g gelatin (1 envelope)
3 1/2 tbsp water
225g milk
110g sugar
2 1/2 tsp green tea powder
6 egg yolks
2 cups cold heavy whipping cream

For Cake
1. Whisk 40g sugar and egg yolks together until well-combined.Set aside.

2. Whisk milk and oil together. Add into egg yolks mixture. Whisk until well-combined.

3. Sifted flour and green tea powder into egg yolks mixture. Whisk until everything is incorporated. Set aside.

4. Add cream of tartar into egg white.

5. Using a whisk attachment on stand mixer or electric hand mixer, whisk egg white till foamy.

6. Add in 1 tbsp sugar. Whisk until sugar is fully incorporated on medium high speed. About 1 minute.

7. Add in another 1 tbsp of sugar. Whisk until sugar is fully incorporated on medium high speed. About 1 minute.

8. Add in all remaining sugar. Set on high speed and beat until stiff peak. About 3 minutes.

9. Using a spatula, take 1/3 of egg whites and fold into the egg yolks mixture until well-combined. There should be no streaks of egg whites.

10. Make a hole in the middle of the remaining egg whites, pour in the egg yolks mixture.

11. Fold in the egg whites into the egg yolk mixture until well-combined.

12. Line a 9 inch cake pan with parchment paper on the bottom. Pour in the batter. (Do not use non-stick pan)

13. Bake for 30 minutes in a 330 F preheat oven.

14. Leave to cool to room temperature before removing from pan.

For Mousse
15. Pour water in a small bowl. Add gelatin to water. Do not stir. Set aside for 5 minutes.

16. Heat milk under low heat.

17. Mix sugar and green tea powder together.

18. Once milk start boiling, add in sugar. Whisk until well-combined and no lumps.

19. Remove from stove and whisk egg yolks quickly until well-combined.

20. Return mixture to stove and cook for 30 seconds under low heat. Whisking continuously.

21. Pour mixture through a sift to remove any lumps and over-cooked eggs. Set aside.

22. Place gelatin mix in microwave and cook for 20 ~ 25 seconds.

23. Add gelatin mix into egg mixture. Whisk until well-combined. Leave to cool to room temperature.

24. Using a whisk attachment on stand mixer or electric hand mixer, whisk the cream till stiff peak. Leave to cool to room temperature.

25. Make a hole in the middle of the cream and pour in the egg mixture.

26. Fold the cream into the egg mixture until well-combined.

Assembly
27. Use a paring knife, go across the side of the cake pan to loosen the cake from pan.

28. Remove cake from pan. Cut cake into two layers.

27. Line a 9 inch cake pan with parchment paper on the bottom and side.

28. Place one layer of cake to the bottom of the pan.

29. Pour 1/2 of the mousse in the pan, on top of the bottom layer of cake.

30. Cover pan with cling wrap and place into fridge for 15 minutes. Letting the bottom layer of mousse set slightly.

31. Place another layer of cake into the pan, on top of the bottom layer of mousse.

32. Pour the remaining mousse into the pan, on top of the top layer of cake.

33. Cover pan with cling wrap and place into fridge. Leave to set for at least 6 hours. Best to leave overnight.

34. Served chill.

************************************************************************************************

Tips & Tricks


1. When cooling cake, leave the cake upside down. This will prevent the cake from sinking in the middle.

2. Do not use non-stick pan. The cake need to stick to the sides in order to rise.

3. After adding gelatin to water, do not stir. Let the gelatin set slowly.

4. Use cool water, not cold but slightly cooler than room temperature. I use cold tap water.

5. When cooking the gelatin in microwave, do it in two separate session. Put it in and cook for 15 seconds. Remove from microwave and swirl the bowl gently for 5 seconds. Place it back to the microwave and cook for another 10 seconds.

6. Make sure the milk is warm when adding gelatin. Cold milk will cause the gelatin to become lumpy.

7. Make sure the whipped cream is at room temperature before adding the milk. Cold cream will cause the gelatin to be lumpy.

8. When assembling the cake, it's best to use a pan with removable bottom. This allow for easy removable of cake. Alternatively, you can use a 9 inch mold set over a baking sheet.

************************************************************************************************

My Baking Pantry


Matcha - Green tea powder
Matcha (green tea powder) is often used for baking. I got my matcha from a local Asian supermarket in the tea section. You can easily get green tea powder online (e.g. Amazon).

It is not the same green tea leaf. You cannot achieve the taste and texture of matcha by grinding green tea leaves. For baking purposes, you need to use matcha.

Ingredients - Green tea leaves

When buying matcha, check the ingredients on the package. Often there is a milk matcha powder which is basically green tea with milk. This cannot be used for baking as the milk powder will affect the texture of the cake or cookie. Make sure the ingredient of your package states only green tea.


Tuesday, September 18, 2012

Cream Cheese Red Velvet Cupcakes

Red velvet cupcakes
I wanted to make something fun for the kids. So I got out some ice-cream cones and decided to make cupcakes with them. 

Red velvet ice-cream cone
They turned out great! I piped cream cheese on the top which looked like ice cream and served them to the kids. At first sight, they screamed "Ice-Cream" and rushed for them. Seconds later, they were licking the cream cheese just like ice-cream.

These cupcakes were great with kids. Since it doesn't melt, there's no mess to clean up after and can be made in advance for parties. You can use any flavor of cupcakes. I made red velvet as these are my husband's favorite. Enjoy some cupcakes for your next party. =)

Red velvet cupcakes

Recipe


For Red Velvet Cupcake
125g sifted cake flour
1/4 tsp baking powder
1/4 tsp salt
1 tbsp cocoa powder
1/2 cup buttermilk
1 tbsp liquid red food coloring
1/4 cup butter (at room temperature)
150g sugar
1 large egg
1/2 tsp vanilla extract
1/2 tsp white distilled vinegar
1/2 tsp baking soda
16 ice-cream cones

Cream Cheese Frosting
227g cream cheese (at room temperature and cut into 1 inch cube)
1/2 tsp vanilla extract
1/2 sifted powdered sugar (sifted)
160 ml cold heavy whipping cream

1. Preheat oven to 350 F. Line muffin pan with ice-cream cones.

2. Sifted flour, baking powder, salt and cocoa powder together. Set aside.

3. Whisk buttermilk and food coloring until well combined. Set aside.

4. Use a paddle attachment on stand mixer or electric hand mixer, beat butter till soft.

5. Add sugar and beat till light and fluffy.

6. Add egg and vanilla extract. Beat until incorporated.

7. Set mixer to low speed and add in 1/3 of flour. Beat until incorporated. (about 3 minutes)

8. Add in 1/2 of buttermilk. Beat until incorporated. (about 3 minutes)

9. Add in 1/3 of flour. Beat until incorporated. (about 3 minutes)

10. Add in remaining buttermilk. Beat until incorporated. (about 3 minutes)

11. Add in remaining flour. Beat until well combined. (about 5 minutes)

12. Place baking soda in a small bowl or cup. Pour in vinegar.

13. Use a spoon to stir in all baking soda quickly and pour into batter. (Should take no more than 5 seconds)

14. Fold the baking soda into cake batter.

15. Spoon batter into cones. Fill up to 1/3 of the cones.

16. Bake for 30 minutes or until skewer comes out clean.

17. Leave to cool on cooling rack.

18. Use a paddle attachment on stand mixer or electric hand mixer, beat cream cheese until smooth.

19. Add in vanilla essence and powdered sugar. Beat until smooth.

20. Replace the paddle attachment with whisk attachment on stand mixer.

21. Add in heavy cream and whip until frosting is thick.

22. Pipe the cream cheese onto cake.

*****************************************************************************************************************

Tips & Tricks


1. Sifted flour before measuring.

2. Baking soda and vinegar has to be incorporated quickly into the batter. The frizz will help the cake to rise.

3. Get the cakes into oven quickly to make sure the frizz in the baking soda is maintained.

4. Make sure cream cheese is at room temperature. If it's too cold, lumps will form.

5. Cutting cream cheese into cubes help prevents lumps from forming.

6. If cream cheese frosting is too wet, add in cream to thicken it.

7. If cream cheese frosting is too thick, add in some powdered sugar to loosen it.

8. Served at room temperature.

9. Adapted from Joy of Baking. See below video for complete demonstration.


*****************************************************************************************************************

My Baking Pantry

Cake Flour
I got my cake flour from Target. This is a common cake flour brand in USA. Cake flour loosen the cake cake making it lighter and airier.

Thursday, August 30, 2012

Hokkaido Chiffon Cupcakes

Hokkaido Chiffon Cupcakes


I'm so "out-dated"! According to the internet, it seems that these little cupcakes can be easily bought from  bakeries in Singapore and Malaysia. However, despite my many trips back to Singapore and Malaysia, I am ashamed to say I've never tried them!

I found this cake while searching on the internet for an easy recipe to use up all my left-over custard cream from my earlier cream puffs experiment. Combining two of my husband's favourite chiffon cake and custard cream - this cake is perfect for using up my cream fillings.

OMG!!! This cake is heavenly. Fluffy soft cake with smooth creamy custard... It's so good! For a baking novice, I do say mine turn out beautifully. I can't wait to try one of these when I next return to Singapore. =)

Fluffy soft cake with smooth creamy custard

***********************************************************************

Recipe 

(Makes 8 cupcakes)

For chiffon cake
3 egg yolks
20g sugar
35g corn oil / vegetable oil
60g milk
70g cake flour

3 egg whites (at room temperature)
1/4 teaspoon cream of tartar (optional)
25g sugar

For custard cream
1 box of French Vanilla Pudding
1 1/2 cup cold milk
1/2 cup cold heavy whipping cream
1/2 teaspoon vanilla extract
1/4 teaspoon of extra-fine sugar / powdered sugar (optional)

For Custard Cream
1. Mix the french vanilla pudding with milk. Set aside in fridge.

2. Whip cream, vanilla extract and sugar with cold mixing bowl and whisk until stiff.

3. Fold in 1/3 of the cream into the french vanilla pudding. Add this mixture into the rest of the cream and fold in gently until all cream has been mixed into the pudding. Set aside in fridge.


For chiffon cake
1. Pre-heat oven to 330F.

2. Arrange paper liners on baking tray.

3. Hand whisk egg yolk and sugar till pale in color.

4. Add in corn oil and milk, continue whisking till combined.

5. Sift in cake flour, continue whisking till combined.

6. Using either stand mixer with whisk attachment or electric hand beater, beat egg white and cream of tartar till foamy.

7. Add in the sugar in 3 separate additions while beating at high speed till just firm peaks form.

8. Take 1/3 of egg white and fold into the egg yolk batter with a spatula.

9. Make a hole in the center of the remaining egg white and pour in egg yolk batter.

10. Fold in all the egg white into the egg yolk batter until well combine.

11. Scoop batter into paper liners until 3/4 full.

12. Bake for 30 mins or when toothpick comes out clean.

13. Remove from oven and use a small knife to poke a 1 cm hole in the surface of the cake.

14. Leave cakes to cool.

Serving Instructions
1. Pipe custard cream into the cupcake using the hole poke earlier.

2. Dust with powdered sugar.

3. Left-over cakes should be refrigerated.

***********************************************************************

Tips and Tricks

1. Do not overbeat the egg white. You can refer to the Kitchn for guide on egg whites.

2. Poke the hole in the top center while the cake is hot.

3. Make sure the cakes are completely cool before piping the cream. Otherwise, cream will melt. So make the cakes 2 ~ 3 hours in advance.

3. Pipe the cream just before serving.

4. Use free standing muffins cups for these recipes.

Adapted from Forbidden Garden.

Wednesday, August 29, 2012

Simple Cream Puffs

Cream Puffs

Have you ever had cream puffs from Beard Papa? Those crunchy puffs filled with vanilla cream are one of my favourite dessert. The first time I tried these puffs was ten years ago, during a holiday in Hong Kong, with a close friend of mine. The aroma of the vanilla cream filled the supermarket at SOGO. It was this aroma that led me to try my first puff.

At US$2 a pop, these yummy puffs don't come cheap, but I never thought of making them. That was until I came across its recipe while searching for custard recipe. The puff recipe was so simple, I had to give it a try!

The final verdict from my family - Taste just like Beard Papa! =)

Custard Cream Puffs


Recipe (Custard Cream Puffs)

Makes appx. 16 cream puffs


(For Puffs)
1 cup water
1/4 teaspoon salt
1/2 teaspoon sugar
1/2 cup unsalted butter (cut into cubes)
1 cup flour
4 large eggs

(For Custard Cream)

1 box of French Vanilla Pudding
1 1/2 cup cold milk
1/2 cup cold heavy whipping cream
1/2 teaspoon vanilla extract
1/4 teaspoon of extra-fine sugar / powdered sugar (optional)

For Custard Cream
1. Mix the french vanilla pudding with milk. Set aside in fridge.

2. Whip cream, vanilla extract and sugar with cold mixing bowl and whisk until stiff.

3. Fold in 1/3 of the cream into the french vanilla pudding. Add this mixture into the rest of the cream and fold in gently until all cream has been mixed into the pudding. Set aside in fridge.

For Puffs / Shells
1. Whisk salt and sugar into water.

2. Place water and butter into a saucepan and bring to a boil. (Do not use non-stick pot / pan).

3. Remove pot away from heat. Add in all flour at once. Stir until combined.

4. Place pot back onto stove and continue mixing the flour until dough comes away from pan, forming a thick smooth ball. (about 1 minute)

5. Place dough  in a mixing bowl. Allow to cool for 2 minutes.

6. Once the dough is lukewarm, use either a stand mixer with paddle attachment or electric hand beater, whisk in the eggs one at a time.

7. Continue mixing until you have a smooth thick paste. (see video)

8. Spoon dough onto baking sheet lined with parchment paper.

9. Place in pre-heat oven at 400F for 15 minutes. Reduce heat to 350F and continue baking for 30 minutes or until puffs have a nice amber color.

10. Remove shells from oven. Poke 2 holes on the sides of each puff.

11. Turn off oven. Place puffs back onto baking sheet and back into oven. Leave the oven door slightly ajar.

12. Let puffs completely cool inside the oven.

13. Place custard cream into a piping bag and pipe in the cream into the holes of cooled puffs. OR cut the cooled puffs into half and use spoon to scoop cream into the puffs.

14. Dust with powdered sugar and served. (Optional)

***********************************************************************